Sunday, July 14, 2013

Mini Album for Sale

How about a beautiful mini album for a special gift. This mini album is $40 plus shipping and Handling. It was made with My Minds Eye Bramble Rose Paper Collection. It has a total of 6 pages, with pockets in the front and a secret gatefold opening in the back. Please email me at momof30728@hotmail.com  with your email information if interested, use mini album as subject.


Monday, June 10, 2013

Faux File Folder Mini

Here is my Mini I made from the tutorial from Angelwings14100 on youtube. Here is a link to the videos. I used BoBunny paper from the  Hello Sunshine line 6x6 pad. This was a very fun and quick mini that can be made in about 2 days or 1 if you are really fast. It does need a t least a 36 count pad of paper and about 5 sheets of 12x12 Cardstock.


Inside of front cove

Front and back page view


Open Flap View
Flowers were used from a prima mixed flower
package I won from Kathy Files.


Made the flower centers from clay and molds
made with embellishments bought from Michaels.


Inside back cover and mini insert
This is where the mini is inserted after binding
 

Monday, February 25, 2013

Altered Bottle


Here are some altered bottles I did. I got the idea from Heidi Bound. Here is her blog that you can check out. Gotham city stampers I received the bottle from a friend. I decoupaged various themed paper with a gel medium. Once dried I distressed it with some of Tim Holt's distress inks. I cut an eiffel tower die from my machine and adhered it to the bottle. I also added various flowers that i got from the floral section of my craft store, aged them with Distres ink also. I also decided to add Mica flakes to my tower. I added various flowers and other embellishments. Try on and see what you come out with.


Thursday, January 3, 2013

Wood and Clay Tiles


This is the clay tile I did in the video. I actually added some blingage and just used glossy accents.


Here is the wood tile I made. I used the crackle accents on this one.


Here is a video where I made these tiles.  
 

Friday, October 5, 2012

Look what I am making tomorrow!!


It is a decorated Felt Top hat. I saw these at Joanns for $20 and it was onsale for $10, however I think my total cost would be about $5, I already had most of the supplies here in my stash. The hat I will be making tomorrow will be different.

So I will be making this on my ustream show tomorrow Saturday  October 6th at 1pm central time on my channel. http://www.ustream.tv/channel/all-things-creative1

Here is a list of materials you will need

Felt- any color or pattern

Trim- ribbon, sequins, beads ect ect ect, possibilities are endless)

Feathers  any feathers will work.

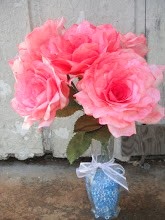
Embellishment - I used some of the rhinestone picks from the bridal section here. I will also make some felt flowers.

Glitter Glue

Hot Glue Gun and sticks

Scissors

Circle dies and or template- I used Spellbinders S4-114 I also cut a template about 4 1/2" circle for my brim.

Stuffing_ I will just use a plastic bag from walmart to stuff it

Headband or a spring clip

Optional - cereal box weight chipboard to keep the brim sturdy, can cut to size of brim. Will explain in the ustream.


If YOu want to precut your felt for the hat here is what I used.

1- 3"x9" strip of felt
1 - 3 3/4" circle largest in the die set
1- 3 1/4" circle 2nd largest in the set
1 4 1/2" circle, I cut this myself cause I didn't have a die for it


Thursday, October 4, 2012

Dragon Canvas


Here is the canvas I did for Boni Grabusky for a swap we participated in. It is 5x7. I took a clip art from the internet and embellished it. Boni loves Dragons and butterflies. The Dragon is glossy accented to pop it out.

Tuesday, July 3, 2012

Negative Mask Technique Class

Tonight on my ustream I will be doing Tags on a technique called Negative Mask. I learned this from a book called Creative Foundations by Vicki Boutin. This book is available at Barns and Noble on the Nook Readers or Paper Back. I will teach you the technique of using a mask or Open Stencil as a mask. It gives a 3-D look.


Materials I am using

Open Stencil of any shape (example Punched Circles or any shape cut on your cutting machine)
Distress Ink and tool
White Craft Ink
Stamps (background and image)
Black Archival Ink
Painters tape for stability
White Gel pen

Join me tonight on my ustream channel http://www.ustream.tv/channel/all-things-creative1 at 7 central.